Painting for Beginners: Making a Final Assessment of Your Art

During my painting classes I frequently get this question: “How do you know when a painting is finished?” All artists are faced with this dilemma. Shall I add this or remove that? On and on it goes. I like this quote from Leonardo Da Vinci: “Art is never finished, only abandoned.” Even though that says quite a bit, it doesn’t say it all. I tell my students to continue working on their painting until they have removed:
• All that doesn’t contribute to the composition; that which they added for the sheer purpose of documenting
• Anything the viewer would not miss unless he saw the photo reference
Painting for Beginners: Justify Your Elements
Ask yourself why you depicted an object in the first place. If you answer by saying it was in the reference photo or in the plein air scene, it may become painting clutter. There needs to be a compositional justification for it. If there is, chances are it will fit into your artwork. If the answer to the “why” does not stand up to scrutiny, I would shred it. If you err on the side of simplicity and leave it out, in most cases it will prove to be the right decision, especially with small paintings.
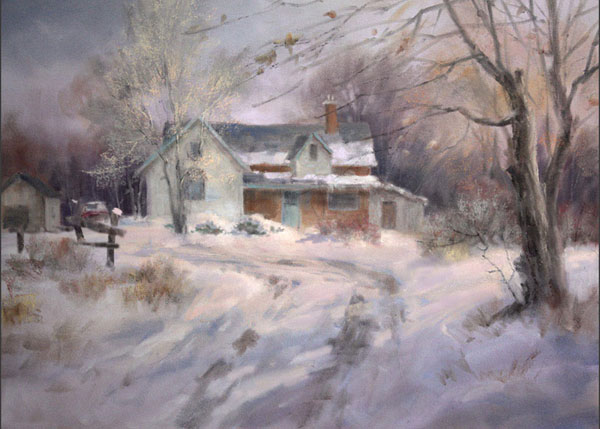
How to Paint for Beginners: Questions to Ask Yourself
Ask yourself these questions before signing your painting and declaring it ready to be framed.
1) Can I still make elements recede more to create depth? Remember you always have the option to scumble over areas to add more atmospheric perspective. Glazing yellows and oranges can add warmth; with violet you can tone down saturated colors as well.
2) Did I institute a visual path?
3) Am I moving the viewer’s eye too quickly?
4) Am I cloning any shapes? Remember they don’t have to be precise clones. Similar shapes need to be considerably different even when viewing from 15 feet away.
5) Can I simplify the painting more?
6) Are my lines boring? Can I tweak them for more visual melody?
7) Will the composition improve if I crop it? Even if it is an oil painting, you can cut the ideal section from the canvas and paste it on a wood panel.
8) Can I implement the pointers at the top of this blog?
9) How is the distribution of these masses, sky, vertical plane and horizontal plane? Am I dedicating too many square inches to any of them or are they competing for attention?
10) Does my painting have two dramatically different sides or am I creating two competitive sides?
11) Can I enhance the mood by adding fog or changing the time of day to show a late evening or even a nocturne scene?
12) Am I unnecessarily resorting to darker values?
13) Can I still soften edges in certain areas?
14) Did I render trees, bushes and rocks that show a three-dimensional volume?
15) Did I variegate the colors?

An Final Assessment Approach
1) Open your painting image in a graphics program and flip it horizontally. You can use a mirror also. This will give you a fresh perspective. You’d be surprised how different it looks and how discrepancies stand out.
2) Flip it vertically to get an upside version. You will only see shapes that don’t make too much sense. This will allow you to determine if they are designed properly.
3) Take into account that small paintings seen from across the room are reduced. Shapes that are nearly symmetrical will become too obvious. Implied clones will stand out. Also, blurred edges seem sharper when viewed from several yards away.
4) Finally, convert your artwork to a gray scale to see how well your values are working. The black and white version should be quite competitive in beauty compared to the colored rendering.
If, after all these suggestions, your painting looks good, frame it!
“Landscape Painting Essentials” and other video courses are available at NorthLightShop.com. North Light has also just released a new eBook written by Johannes titled Landscape Painting Essentials. Join his online art classes at http://improvemypaintings.com.


Have a technical question?
Contact UsJoin the Conversation!