All About Watercolor Painting for Beginners
Watercolor painting is the process of painting with pigments that are mixed with water. Of all the painting processes, watercolor painting is known for its inherent delicacy and subtlety because watercolor art is all about thin washes and transparent color (though watercolors can be made opaque with the addition of Chinese white). Traditionally, watercolor artists work on paper, though the tooth of the surface can vary greatly. Oftentimes the white of the painting surface will gleam through and lend itself to the luminosity of the painting.
When artists first learn how to paint watercolor art, the fluidity of the medium is often a stumbling block because it makes the paint less predictable. Successful watercolor artists know how to balance control and freedom in their work, using watercolor painting techniques that create effects that often occur almost by accident rather than on purpose.
A watercolorist uses watercolor painting techniques like washes, working wet in wet and wet on dry, lifting out and masking out for highlights, and dozens of other techniques to achieve textural effects. But most of all, watercolor painting comes back to the premise that the watercolor lessons and methods matter-but what matters most to a watercolor artist is letting go and finding a balance between controlling and freeing this painting medium.
Part 1: Step-by-Step Watercolor Art Lesson
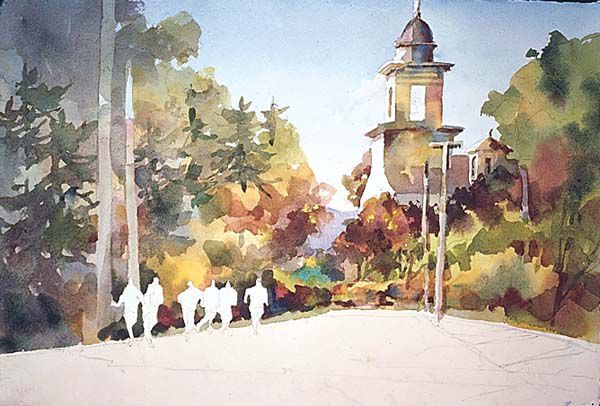
Watercolor lessons are often best seen, so Margaret Martin’s step by step watercolor demo is particularly helpful for students of the art. Her painting, Country Jewels, is one in which the artist adds figures to her architectural and landscape scenes. Martin believes this allows her to better direct the viewer’s glance and give a sense of movement and life into her watercolor paintings.
Step 1
Martin starts with a photo reference for many of her watercolor art pieces, evaluating the photos for shapes and aspects of composition that she can pull from. For Country Jewels, she decided on a warm color palette and inserted figures into the painting for interest. She creates a sketch for the watercolor painting, using a felt-tip line pen to draw out the foreground, middle ground, and background for the painting, as well as identifying the basic lights and darks with cool-gray markers.


Step 2
Starting the watercolor painting, Martin drew in the composition on her watercolor paper and then applied a wash of alizarin crimson and Winsor yellow to the foreground. Once it was dry, a wet-in-wet layer of Winsor blue was applied to the background by the watercolorist. The washes come together near the horizon line and Martin adds in the faraway mountains with French ultramarine and Winsor blue.

Step 3
Martin progresses through the watercolor painting by first working on the large area of foliage in the composition, using the blue shade of Winsor green and burnt sienna. Lights in the middle area of the forest are done with burnt umber, cobalt violet, Winsor orange, red, and yellow. The watercolorist keeps the brushstrokes broad and painted around the areas where the figures would eventually go, leaving areas of white.
Step 4
As the watercolor painting comes together in the background, Martin redirects her focus to the middle ground. The edges of the runners are crisp and diffused, and sometimes of a similar value to the watercolor’s background. The shadow areas are Winsor yellow, blue, and orange, and perylene violet. The result is the shadows are warm with glimmers of the white of the paper to indicate sunlight.The artist made a point of establishing a sense of visual unity and color harmony by using the same colors throughout the whole of the painting. Note how the artist also enhanced the painting by adding reflections in the puddle and birds in the sky for more visual interest.
Source: Watercolor magazine, Winter 2008.

Part 2: Let Go of the Details for Watercolor Art

Jim McFarlane teaches watercolor art from the perspective that simplicity is everything. In his workshops, whether his students are portraying a traditional arrangement or something from their imaginations, McFarlane stresses that the white of the watercolor painting paper should be used for sunlight, and then all remaining values should be reduced to one light, one middle, and one dark. “Using a limited number of values in a watercolor painting requires that you link areas of similar values together, resulting in larger shapes and sounder compositions,” he says.
These watercolor art sketches can become roadmaps to final paintings and actually allow watercolor workshop students to loosen up because it helps them to learn how to avoid the details and capture large shapes and values. To one watercolor artist in his class McFarlane cautioned, “You’re getting caught up in the minutiae. I can tell as you’re putting down color that you’re thinking ‘tree.’ Forget what it is and get the large shape in. The question is whether you can see the tree as a simple shape and put it in the correct value relationship to the rest of the painting.”
From there, McFarlane encourages students to reduce their image to three or four value areas. This helps the watercolorist decide which zone-foreground, middle ground, or background-is going to be the focus of the painting. For the final phase of painting, McFarlane uses a nine-value scale. The area of the lightest value gets few and lighter values. The middle value represents a larger and slightly darker range; and the dark value represents all the values on a nine-value scale and the white of the watercolor paper. This arrangement is especially useful for a watercolor painting because it simplifies all the visual information while allowing the artist to change the pattern and switch the focus of the painting if they choose.
Source: Watercolor magazine, Spring 2011.
Part 3: Watercolor Painting Essentials

Watercolor artists want fresh applications of paint with fine control with enough detail to lend a narrative to their works while preventing the finished piece from feeling overworked. To do so, here are some watercolor lessons gathered from the brightest and savviest watercolor painters in the business.Artist John Falato emphasizes the importance of preparation in watercolor painting, using his own work area as an example. He lays out two palettes, one for gouaches and one for watercolors-two large containers for water, and three cups for mixing washes.
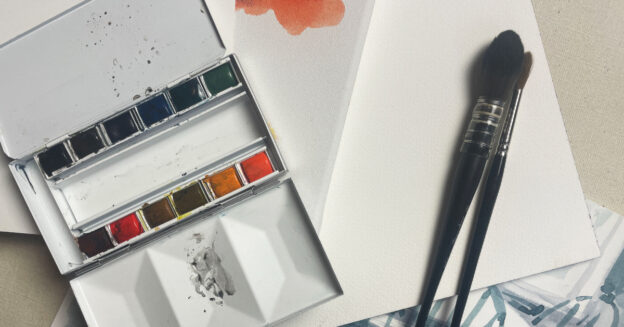
Another plastic cup held an array of brushes ranging from sable rounds and large squirrel flats to stubby bristles and fluffy brushes for mopping up. Other supplies included a pump spray bottle, a small sponge, tissues, paper towels, and a drawing board with a sheet of Arches watercolor paper.When it comes to choosing brushes to create watercolor art with, you want a brush with spring to it, and one that will hold a lot of paint.For smooth watercolor painting washes, the object is to create a bead of paint and keep it moving around objects and across the paper as best as you are able. Use a brush that is appropriately sized to the wash you want to create, and it is not outside the realm of possibility of using two brushes for a wash-one for large areas and one for areas with a lot of detail or edgework.
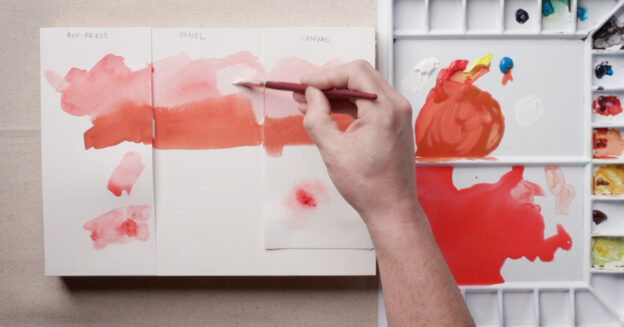
Soft edges are a result of working on a wet watercolor painting surface. If the painting surface has dried, it needs to be wetted, and that can be done with a brush, sponge, or spray. A spray bottle is often most effective because it doesn’t lift the color from underneath. When going back in with a brush, remember to not overwork the edge. Just do it once and let the area dry. Edges will continue to blend as the paint dries.
Source: Adapted from an article by John A. Parks.
Free eBook: Watercolor Lessons on Depth and Luminosity: 10 Watercolor Painting Techniques from Artist Daily





Join the Conversation!