Master Copy | Painting a Corot Landscape
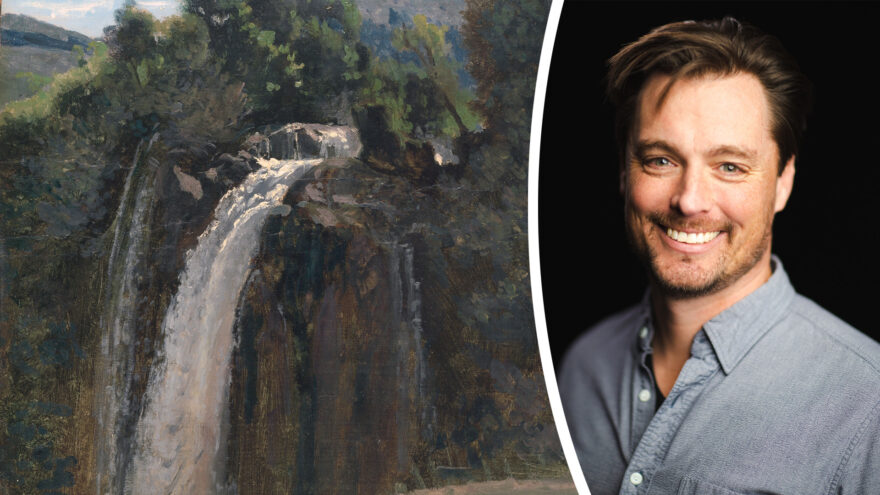
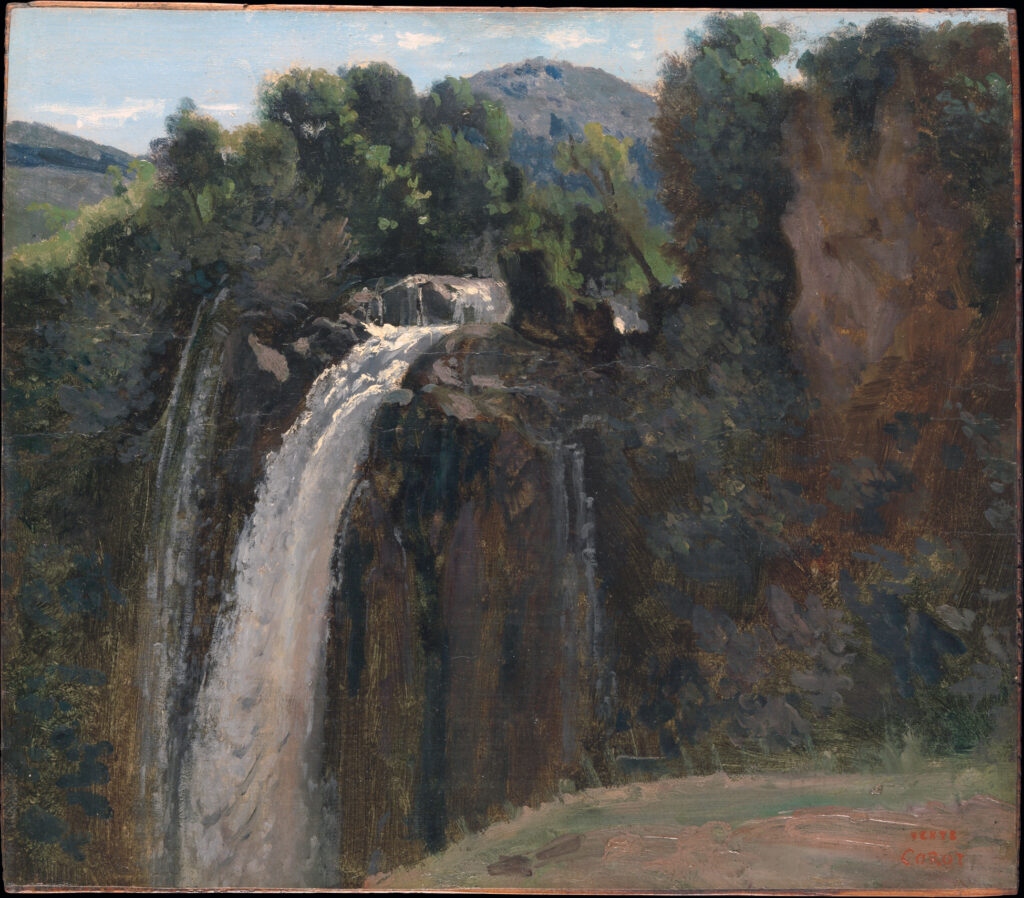
Jean-Baptiste Camille Corot (French, 1796–1875) holds a special place in the ongoing story of plein air painting. Known primarily for his landscapes, Corot inspired, and to some extent anticipated, the plein air innovations of the Impressionists. His excursions painting the Roman Campagna, in Italy, continue to influence outdoor painters to this day. To better understand his process, approach and mindset for plein air painting, I attempted to copy Corot’s Waterfall at Terni (below), painted in 1826.
The goal of any master study is to learn something about the artist’s mindset and process—not to create an exact duplicate. It’s evident that Corot used controlled brushwork, looked deeply at his subject and refrained from fussing with the drawing or proportions. For my study, I wanted to maintain that same spirit, painting as though I were on location and accepting that there would be differences between my work and the original.
Artist’s Toolkit
- OIL PAINTS: titanium white, Hansa yellow, yellow ochre, burnt umber, ultramarine blue, Indian red, veridian green, Payne’s gray
- SURFACE: Legion Stonehenge oil paper
- BRUSHES: a variety of brights and rounds
- MEDIUM: walnut oil
- MISCELLANEOUS: graphite pencil
Demonstration: Study of Corot’s Waterfall at Terni
My project started with research into Corot’s materials. The original painting was done on paper, which the artist commonly used for his plein air studies. These paper studies were then frequently mounted onto canvas or wood, as is the case with Waterfall at Terni . With this in mind, I settled on my list of materials and set to work.
Step 1
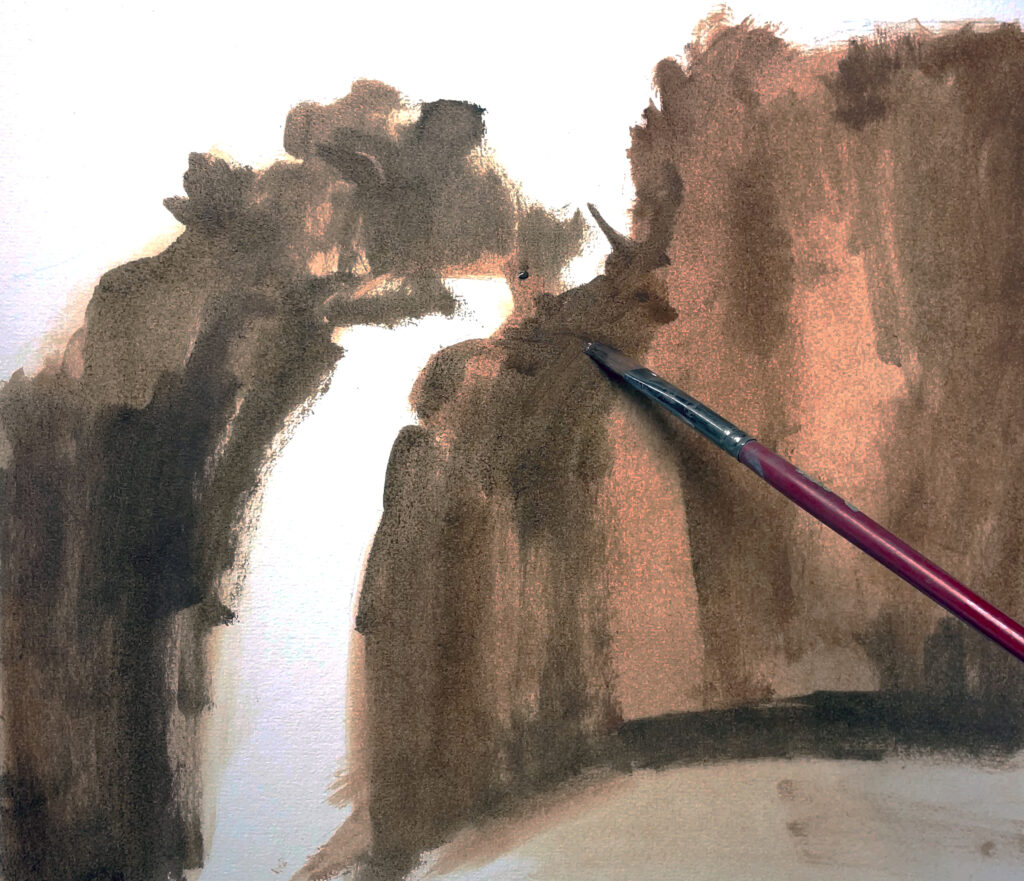
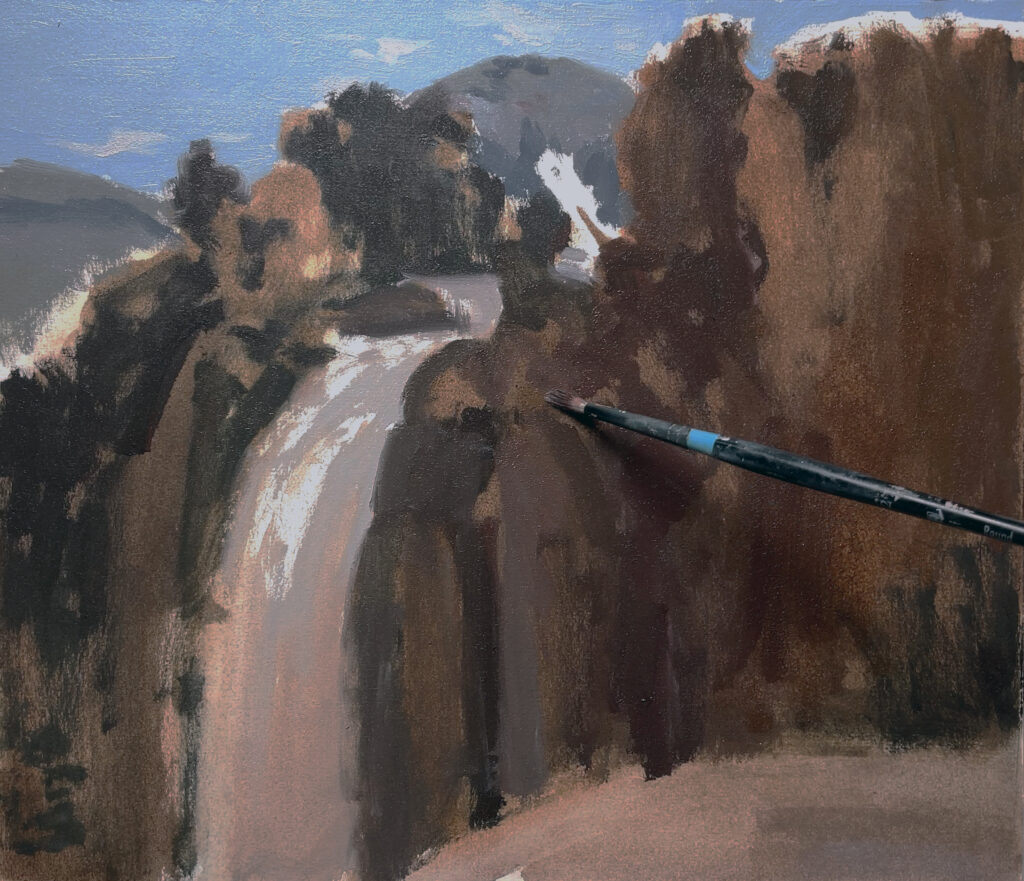
The original painting, as well as other sketches, show traces of simple lines to indicate where land meets sky, with no drawing in the foreground. I took this approach with my painting, using quick, light lines along the trees and hills where they meet the sky at the top of the piece . Using those lines as a guide, I blocked in the trees and cliff wall , using a mixture of burnt umber and Indian red. This established the foundation of the composition by creating basic light and dark shapes to divide light and shadow.
Step 2
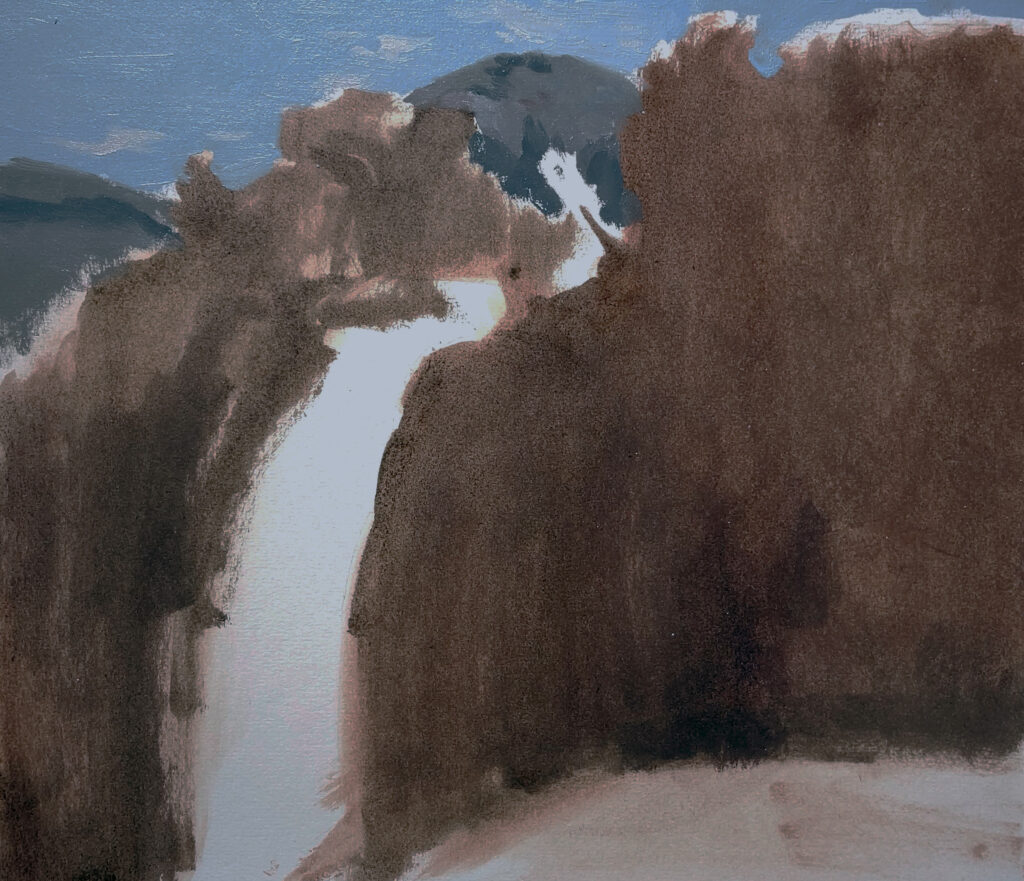
I painted the sky and distant mountains. Titanium white and ultramarine blue served as the foundational colors for the sky, with touches of veridian green and burnt umber modulating the temperature and saturation of the blue. The distant hills were painted with a primary mixture of veridian green and Indian red, with some titanium white added to manage the value. The veridian and Indian red make for a beautiful neutral color mixture that create s atmospheric perspective when contrasted with more saturated colors in the foreground.
Step 3
I established the darks in the cliff and tree areas. Payne’s gray was used to darken the veridian, Indian red and burnt umber mixtures. It’s best to use Payne’s gray sparingly, however, as it will desaturate other colors . While this area of the painting is in shadow, keeping the colors saturated will help advance them through their contrast with the desaturated hues of the distant mountains. The shadows of the waterfall were also established with a medium gray.
I used larger brushes for that area, keeping my brushwork controlled without fussing over the details.
Step 4
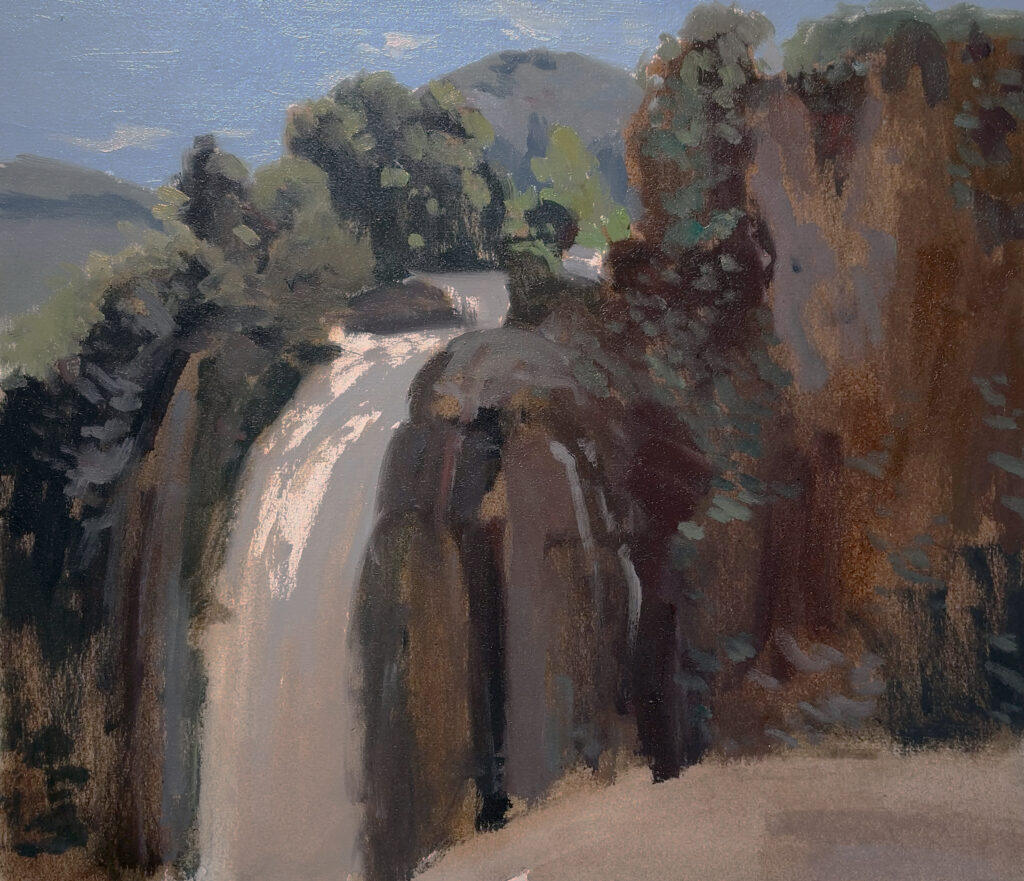
I painted the lights along the tree line using combinations of Hansa yellow, yellow ochre, veridian and burnt umber. Veridian is a strong pigment, so it’s best used in small doses. Titanium white was used to lighten values as necessary. I used smaller brushes with greater control and precision for this section, as it’s the light greens that refine the structure of the tree and bring the painting into focus.
I also worked the reflected light in the shadow area. The challenge with these colors was in managing the value and saturation effectively. If the colors are too light or too saturated, they’ll advance out of the shadows and diminish the effect of the highlights. I kept the brushwork loose, with an emphasis on direction. While these marks are simple, they’re critical in creating the form of the foliage and refining the quality of light throughout the painting.
Final
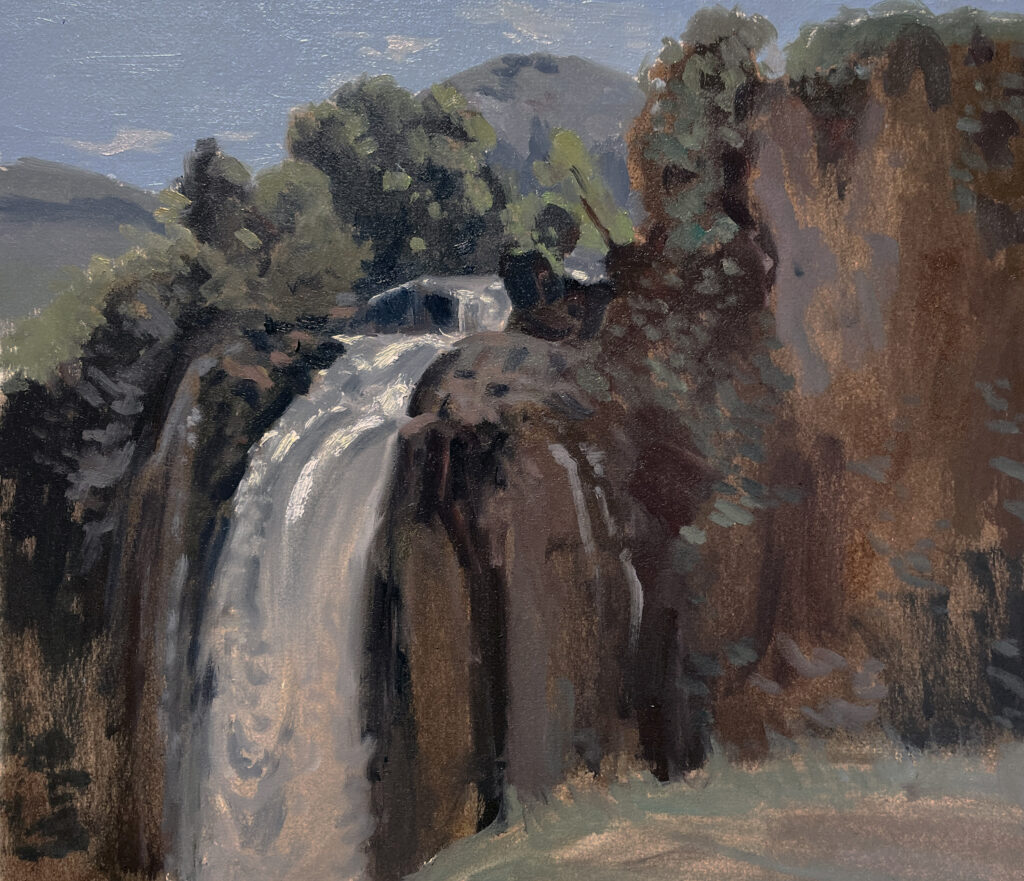
I began the final stage by painting the foreground ridge using desaturated colors and making directional marks with a large brush. Then I addressed various areas of the painting, scraping and scumbling to soften the edges of the waterfall and the shadow area. Finally, I added highlights along the top of the waterfall to bring the top area into focus and finish the painting.

Meet the Artist
Scott Maier is an artist and a content contributor to artistsnetwork.com. He’s also the author of the instructional art book See, Think, Draw: An Easy Guide for Realistic Drawing and Beyond.







Join the Conversation!